
Bumper and Trim Smoothing.
2 posters
Page 1 of 1

Bumper and Trim Smoothing.
![]() The Bishop Wed Feb 22, 2012 2:13 am
The Bishop Wed Feb 22, 2012 2:13 am
Bumper & Trim Smoothing
Project Focci
Ok I was asked for some advice on Bumper and Trim Smoothing. Now please remember, I am not a panel beater, I have no offical traing in bodywork. I have simply learned from trial and error over the years. THis is a simple How 2 guide to give you an idea of where to start and the way it has been done in the past.
So Josh, if you are reading, take your time and dont bite off more than you can chew, plan ahead, and if you dont have the luxury of a garage, CHECK THE WEATHER.
Enjoy this guide, I hope it is helpful, Thanks for reading.
Happy Modding
The Bishop
So Josh, if you are reading, take your time and dont bite off more than you can chew, plan ahead, and if you dont have the luxury of a garage, CHECK THE WEATHER.
Enjoy this guide, I hope it is helpful, Thanks for reading.
Happy Modding
The Bishop

The Bishop- The Boss

- Posts : 71
Join date : 2012-01-24
Age : 48
Location : Barry-Bay-Dos -

Re: Bumper and Trim Smoothing.
![]() The Bishop Wed Feb 22, 2012 3:15 am
The Bishop Wed Feb 22, 2012 3:15 am
Bumper & Trim Smoothing: Intro
Project Focci:
The first thing you need before you start is the correct tools and consumeables. Depending on the work you are looking to do the consumeables will vary. The tools should remain the same.
Tools:-
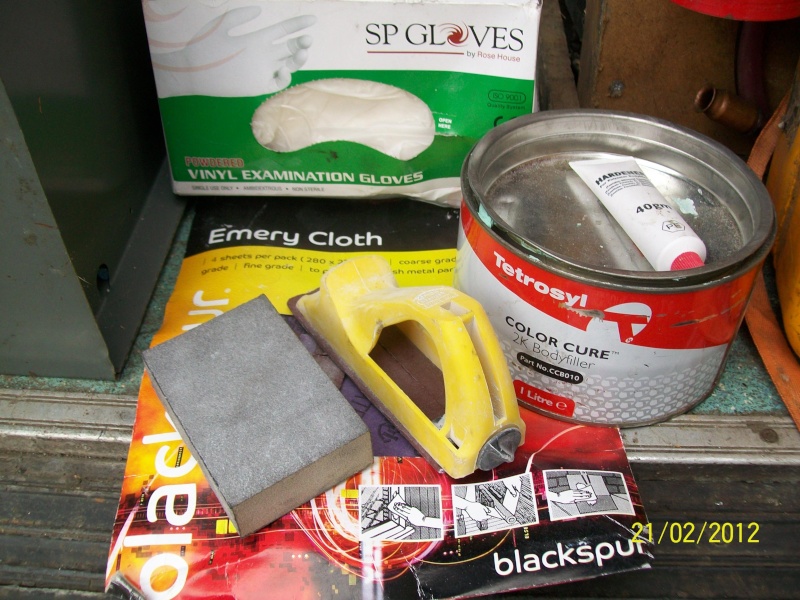
Sandpaper / Wet & Dry : - 80 - 1500 Gritt
Emory Cloth: - Various Gritts.
Sanding Block: - plastic or other (proffessional ones on a well know Auction site)
Shaping Rasp: - couple of quid (The Yellow thig above stanley do a good one.)
Hard Board:- for mixing on
Tack Wrags: - for cleaning
Bucket: - duhhhhhhh
Sharp Blade: -
Small tool Kit: - screw drivers etc
Drop Cloths: - not essential but keeps the place clean.
Speaders: - (should come with filler but you can get diffrent sizes)
Gloves: -
Mask / Resperator: -
Scissors: -
Consumeables: -
Body Filler / Bondo / P38 / Isopon: - Call it what you want you need it)
Hardener: - (should come with the filler but you still need it)
Panel wipe: - (brake & cluthch cleaner is the same. get a gallon always useful)
Fibre glass resin : - (davids is ok about £5 for a big yellow can)
Depending on work involved
Fibre glass chopstrand matting: -
Fibre glass cloth: - (sometimes called fleece)
P40: - (Isopon branded fibre glass filler)
Wire Mesh: - (used for bridging gaps and shaping)
So that is about it for the things you will need for the job. I am sure that I have forgotten somethings, but oh well.
Although the project included smoothing the rear qtr panels and doors of the car, I am going to concentrate on the bumpers in ths guide. I will show you some pics of the other parts we did, but to keep it simple we will just do the bumpers.
As I am currently doing this job, the guide my consist of updates, as the project progresses, but if dan has anything to do with it, it will be done in a day anyway. All of this job is being done on Plastic Standard Ford Focus Bumpers. But you can use the same techniques to do any job.
Project Focci:
The first thing you need before you start is the correct tools and consumeables. Depending on the work you are looking to do the consumeables will vary. The tools should remain the same.
Tools:-
Sandpaper / Wet & Dry : - 80 - 1500 Gritt
Emory Cloth: - Various Gritts.
Sanding Block: - plastic or other (proffessional ones on a well know Auction site)
Shaping Rasp: - couple of quid (The Yellow thig above stanley do a good one.)
Hard Board:- for mixing on
Tack Wrags: - for cleaning
Bucket: - duhhhhhhh
Sharp Blade: -
Small tool Kit: - screw drivers etc
Drop Cloths: - not essential but keeps the place clean.
Speaders: - (should come with filler but you can get diffrent sizes)
Gloves: -
Mask / Resperator: -
Scissors: -
Consumeables: -
Body Filler / Bondo / P38 / Isopon: - Call it what you want you need it)
Hardener: - (should come with the filler but you still need it)
Panel wipe: - (brake & cluthch cleaner is the same. get a gallon always useful)
Fibre glass resin : - (davids is ok about £5 for a big yellow can)
Depending on work involved
Fibre glass chopstrand matting: -
Fibre glass cloth: - (sometimes called fleece)
P40: - (Isopon branded fibre glass filler)
Wire Mesh: - (used for bridging gaps and shaping)
So that is about it for the things you will need for the job. I am sure that I have forgotten somethings, but oh well.
Although the project included smoothing the rear qtr panels and doors of the car, I am going to concentrate on the bumpers in ths guide. I will show you some pics of the other parts we did, but to keep it simple we will just do the bumpers.
As I am currently doing this job, the guide my consist of updates, as the project progresses, but if dan has anything to do with it, it will be done in a day anyway. All of this job is being done on Plastic Standard Ford Focus Bumpers. But you can use the same techniques to do any job.
The Bishop- The Boss
- Posts : 71
Join date : 2012-01-24
Age : 48
Location : Barry-Bay-Dos -
Re: Bumper and Trim Smoothing.
![]() The Bishop Wed Feb 22, 2012 3:43 am
The Bishop Wed Feb 22, 2012 3:43 am
Bumper & Trim Smoothing: Part 1
Project Focci:

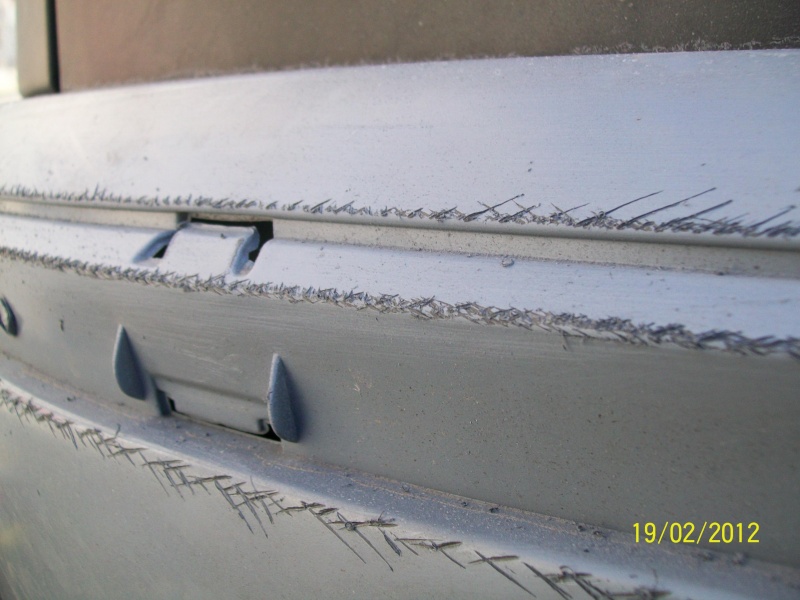
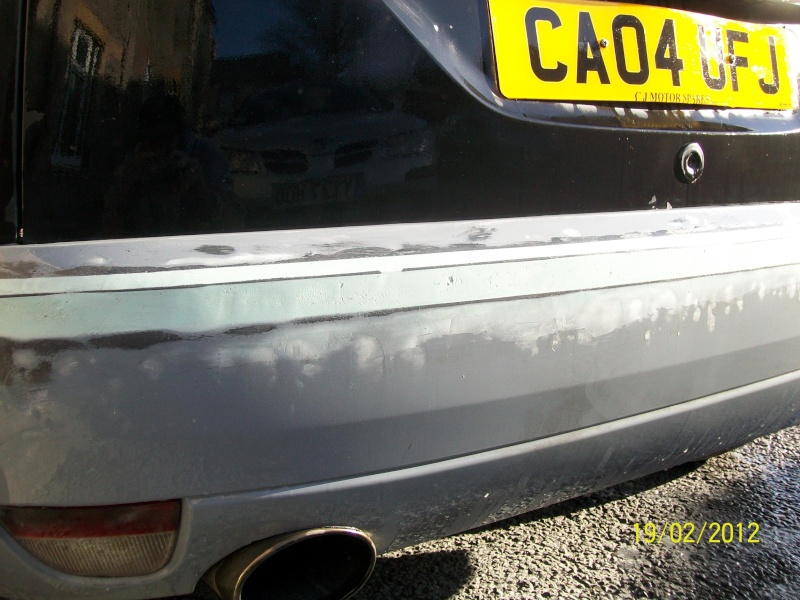
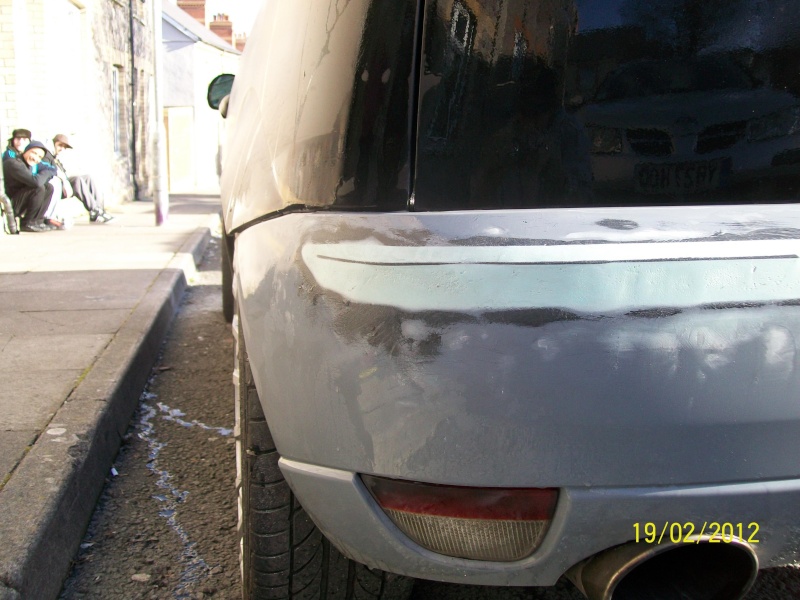
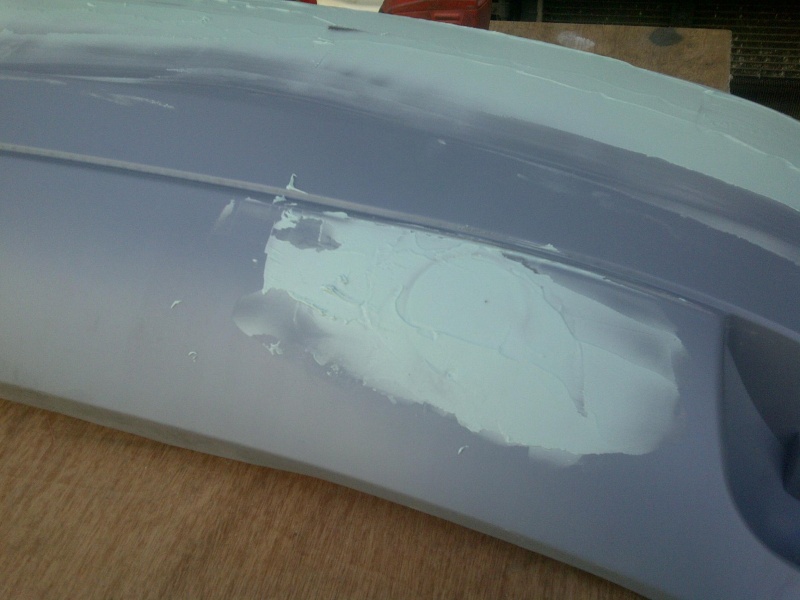
So it Begins, as you can see the bumpers usually have bump strips, the plan is to smooth out where the bump strips fit and have a smoothed bumper.
The first job is to scuff up the plastic around the area of the job. This will help the bondo to stick to the bumper, dont go nuts, just use some 160 gritt sand paper to rough it up a bit and give a good key. I cheated and used a hacksaw blade because im cool.
Grab your Filler kit, and hardboard. Follow the instructions on the pack for mixing, bare in mind you will have around 15 minutes to do the work so dont mix too much but enough that you can use for the job. Once you have mixed the hardener in to the filler evenly, begin to apply. You wont have enough to cover the whole job but that is a good thing. just try to apply and squeeze out all of the air.
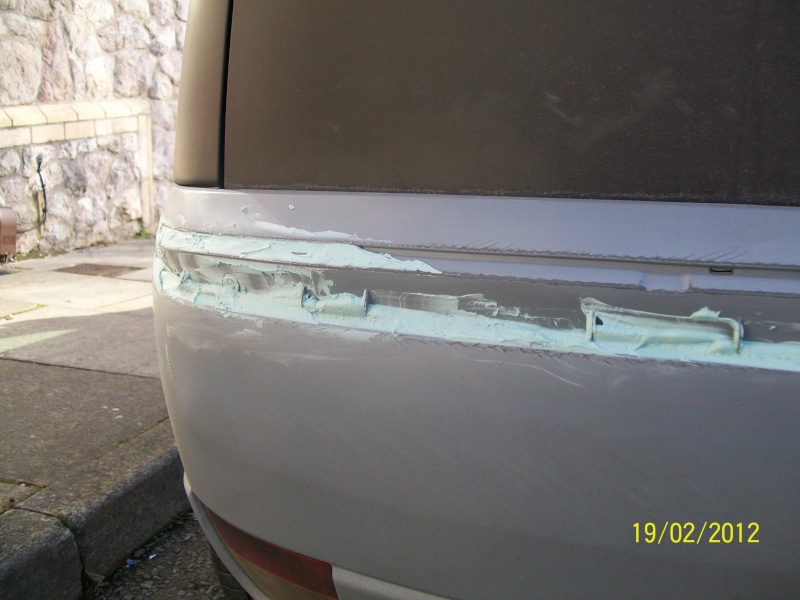
Once you have applied all the workable filler you made up, Go make a coffee, have a fag or do another job while the bondo dries. As I said in the Centre console How 2, the bondo will warm up to the touch as it cures, this is totaly normal, once it is cool to the touch it will be dry and ready.
Repeat the process untill the whole area of the job is covered in bondo, make sure each layer is compleatly hard and cured before the next is applied. Remember if you are going for a curve you will need to apply filler over a larger area than the specific obsticle. This will give you enough room to shape correctly.
All of the little plastic bits and the fact we are doing several layers is a good thing, as it will help to get a good bonding onto the bumper.
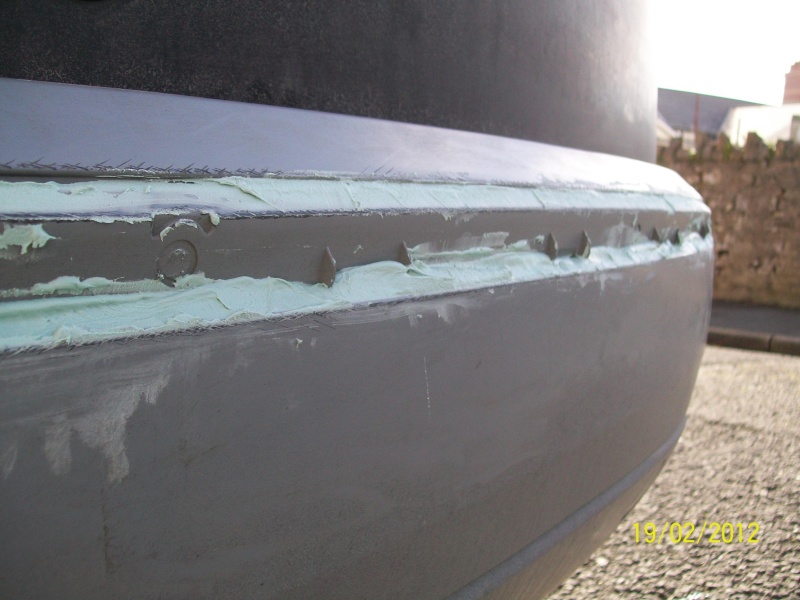
Grab your Sanding blocks and shaper and start to take off some of the excess bondo. This was as far as we got on day 1. Next job is to ad more bondo ad a diffrent consistancy to finish the smoothing off. I will cover this in part 2.
Thanks for Reading
Happy Modding
Project Focci:
So it Begins, as you can see the bumpers usually have bump strips, the plan is to smooth out where the bump strips fit and have a smoothed bumper.
The first job is to scuff up the plastic around the area of the job. This will help the bondo to stick to the bumper, dont go nuts, just use some 160 gritt sand paper to rough it up a bit and give a good key. I cheated and used a hacksaw blade because im cool.
Grab your Filler kit, and hardboard. Follow the instructions on the pack for mixing, bare in mind you will have around 15 minutes to do the work so dont mix too much but enough that you can use for the job. Once you have mixed the hardener in to the filler evenly, begin to apply. You wont have enough to cover the whole job but that is a good thing. just try to apply and squeeze out all of the air.
Once you have applied all the workable filler you made up, Go make a coffee, have a fag or do another job while the bondo dries. As I said in the Centre console How 2, the bondo will warm up to the touch as it cures, this is totaly normal, once it is cool to the touch it will be dry and ready.
Repeat the process untill the whole area of the job is covered in bondo, make sure each layer is compleatly hard and cured before the next is applied. Remember if you are going for a curve you will need to apply filler over a larger area than the specific obsticle. This will give you enough room to shape correctly.
All of the little plastic bits and the fact we are doing several layers is a good thing, as it will help to get a good bonding onto the bumper.
Grab your Sanding blocks and shaper and start to take off some of the excess bondo. This was as far as we got on day 1. Next job is to ad more bondo ad a diffrent consistancy to finish the smoothing off. I will cover this in part 2.
Thanks for Reading
Happy Modding
The Bishop- The Boss
- Posts : 71
Join date : 2012-01-24
Age : 48
Location : Barry-Bay-Dos -
Re: Bumper and Trim Smoothing.
![]() The Bishop Tue Mar 06, 2012 4:12 am
The Bishop Tue Mar 06, 2012 4:12 am
Bumper & Trim Smoothing: Part 2
Project Focci:
Ok, long time since last update, Boys Birthday and 6 Nations go in the way. No that Dan has given me his bumper and re fitted the old one, we should get the job done a bit quicker. In this update I will show you the shapping and top skim. Nearly done. One More update and we should be painted and fitted. So lets go.
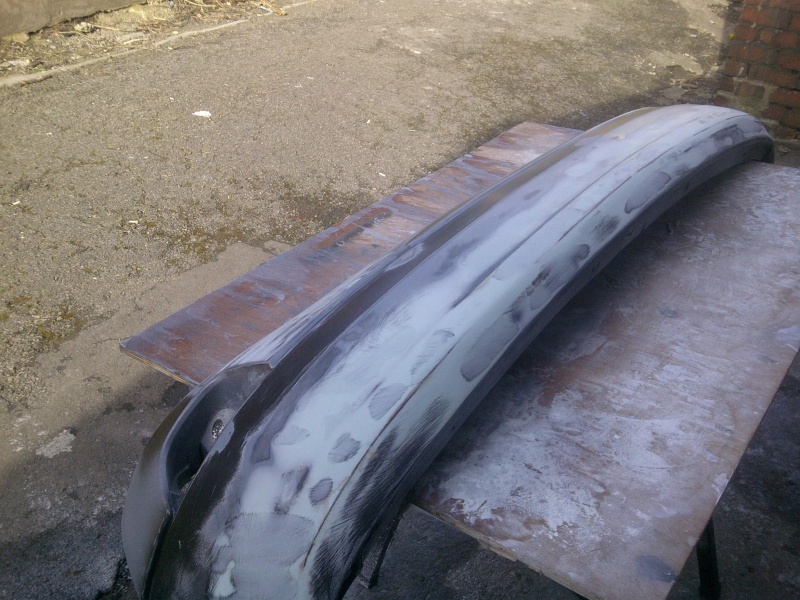
So this is where we left off last time. The Bump Strip has been fully bondo'd and had plenty of time to set off. Next is to start the solidifying and shapping stage. As it is currently would be fine (If you want half a job or dont care about the future), But we need a better finish than this.
First thing to do Is grab you "Davids" Fibre Glass Resin and hardener. I mixed up quite a bit for this job. Mix the Hardener and stir well. The long you work the resin the thiner it gets (which is what we want). once mixed and to a consistancy you are happy with, grab a cheap paint brush and slap it on. You want to cover all of the bondo you have already put on and go over by a good inch onto the bumper. The point of this is to seal the bondo and get a good adhear to the bumper surface. This will leave less chance of cracking or the bondo comming away from the bumper.

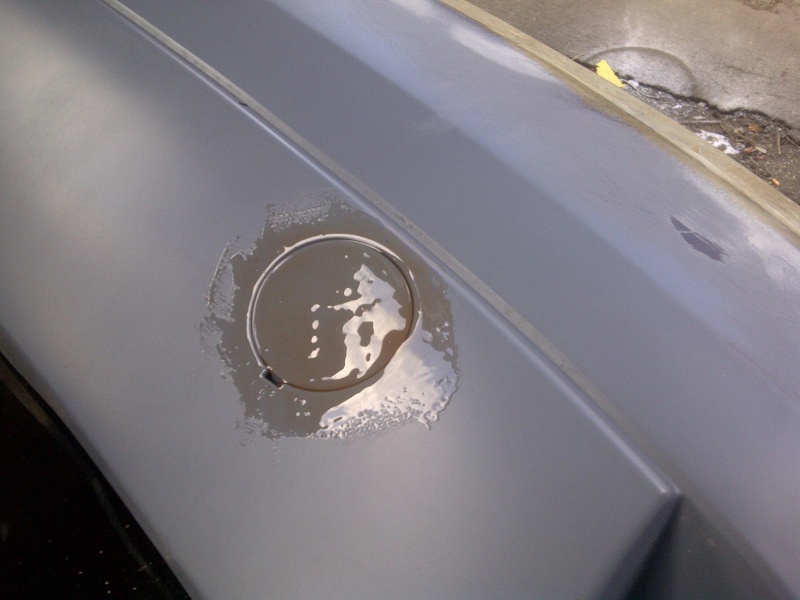
While your at it, cover the Tow Eye with Resin too. this will glue it in and give a stong base for the bondo.
Next up get mixing again. we need enough bondo to cover the area and go over by at least 2 inches. When you are putting it on, try to shape it with the applicator, dont worry to much but it can save you alot of sanding. It is more improtant to get an even coverage and with as few air bubbles and low spots as possible.
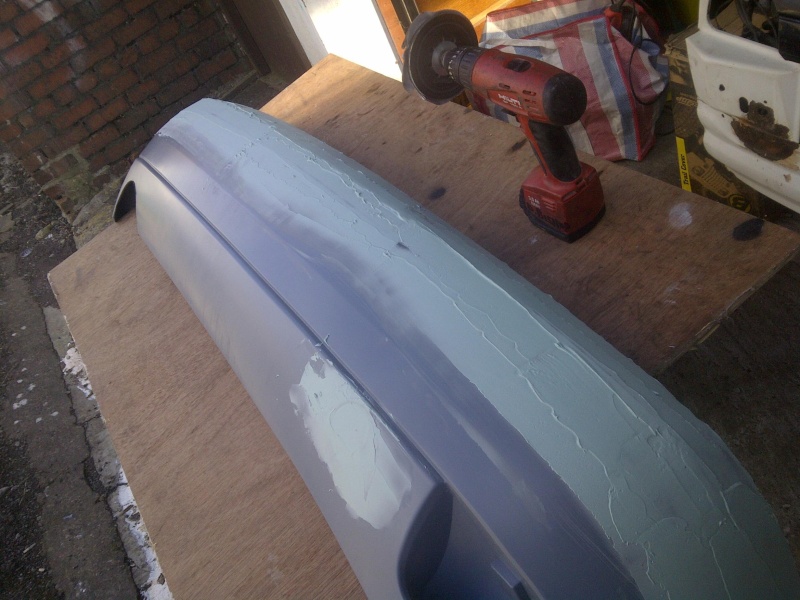
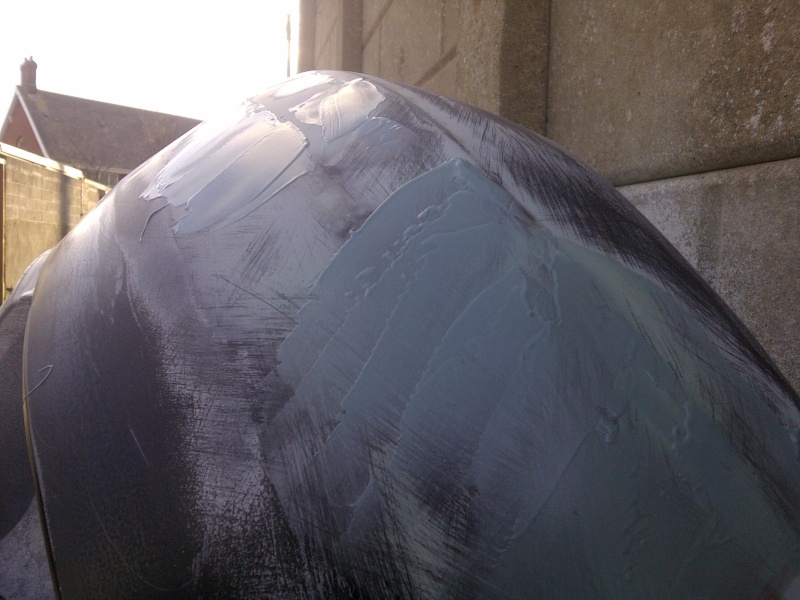
Now for the Shapping. I have got a Snap-on Air mini sander. But a Drill with a Hook and Loop pad fitted will work fine. You should also have a "SUREFORM" or sanding block to make the shaping even and easier to do.
Start by sanding off all of the excess bondo on the edges and the hard lines. dont to too nuts or you will have to re apply. Always use alternating diagonal strokes, never go along the go along the panel as this will cause flat spots. Where needed go over edges with a curving motion, this will give you a nice curved edge, if not you will get sharp lines in the filler.

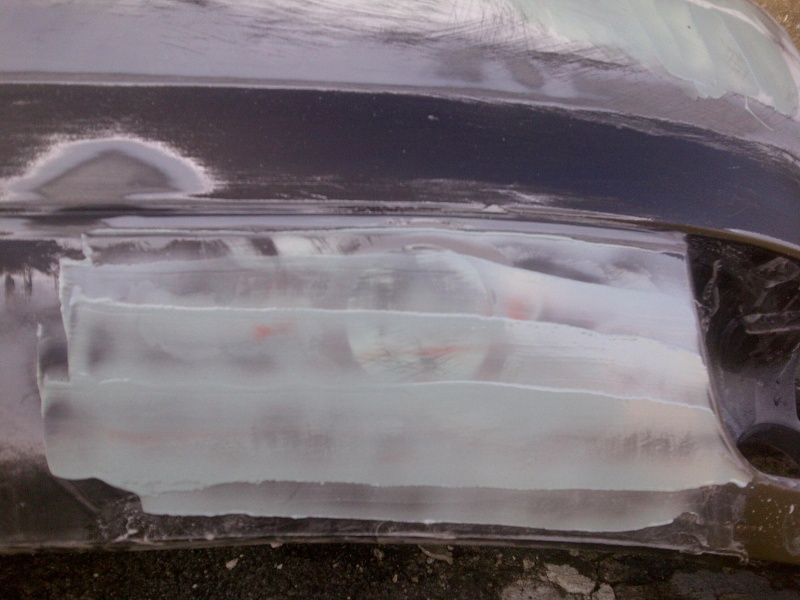
DONT STOP NOW, LOADS TO DO. Next up grab a can of contrasting paint. Spray on a Scatch coat. This will help during the next prosses and also gives you the satisfaction of seeing the bumper in a semi finished state.
Next up Wet Flatting. Grab a bucket of clean warm water and some Medium (600) Grit Wet & Dry Paper. Use a Foam Block for better control. You need to sand all of the area that you have scratch coated, you dont need to get all of the paint off the point is that the paint will show the differece between the HIGH & LOW spots. Use a light touch and plenty of water and sand the whole area. as this goes on you will see the low spots reveling themselves and the bondo will take on a smooth and silky aperence. Run you finger over the area regularly to check the finish, a bare finger is the best guage, and you will feel the lows and highs as well as any edges or ridges that you need to deal with.

All of the Low spots are where the paint is till showing. dont worry too much about the lines caused by sanding, you are more worried about the air pockets that have popped and the depressions. Now get your pens out HOT TIP comming.
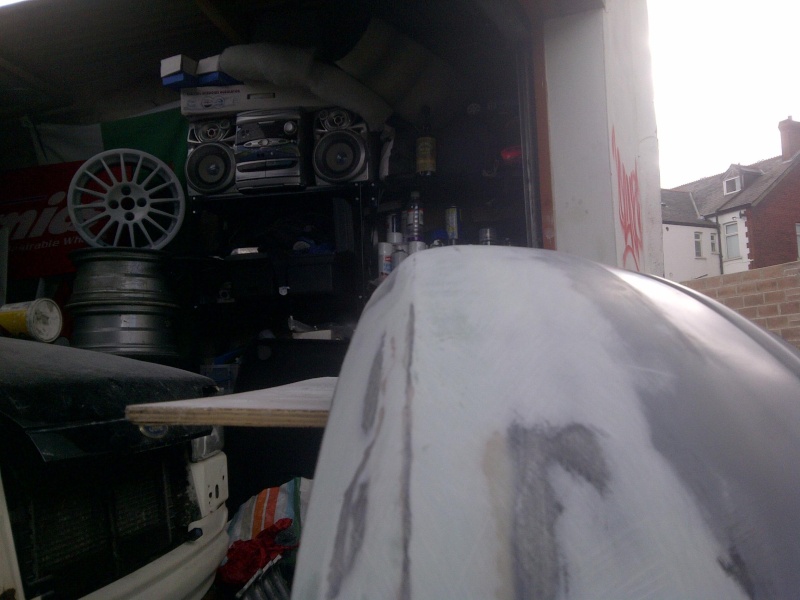
Grab your Fibre Glass resin, put a dolop of Bondo an a mixing plate and make a hole in the middle, pour in a good bit of resin. Now mix it all up. This will give you a mix of bondo that is almost runny. It will still stick, but it is now really smooth, Also grab a can of spray paint and spray some on your mix. This will slightly change the colour of your mix and make it easier to sand later. Now mix in the Hardener you can add a bit more than normal but not too much. Now apply to the areas of low spots and try to keep it all neat and tidy.
Let this Set off and then its all about the Wet Flatting. Repeat if needed.
Now time for a Coffee in my Spice Girls Mug.

More soon Including Finishing and Paint.
Thanks for reading
Happy Modding
The Bishop
Project Focci:
Ok, long time since last update, Boys Birthday and 6 Nations go in the way. No that Dan has given me his bumper and re fitted the old one, we should get the job done a bit quicker. In this update I will show you the shapping and top skim. Nearly done. One More update and we should be painted and fitted. So lets go.
So this is where we left off last time. The Bump Strip has been fully bondo'd and had plenty of time to set off. Next is to start the solidifying and shapping stage. As it is currently would be fine (If you want half a job or dont care about the future), But we need a better finish than this.
First thing to do Is grab you "Davids" Fibre Glass Resin and hardener. I mixed up quite a bit for this job. Mix the Hardener and stir well. The long you work the resin the thiner it gets (which is what we want). once mixed and to a consistancy you are happy with, grab a cheap paint brush and slap it on. You want to cover all of the bondo you have already put on and go over by a good inch onto the bumper. The point of this is to seal the bondo and get a good adhear to the bumper surface. This will leave less chance of cracking or the bondo comming away from the bumper.
While your at it, cover the Tow Eye with Resin too. this will glue it in and give a stong base for the bondo.
Next up get mixing again. we need enough bondo to cover the area and go over by at least 2 inches. When you are putting it on, try to shape it with the applicator, dont worry to much but it can save you alot of sanding. It is more improtant to get an even coverage and with as few air bubbles and low spots as possible.
Now for the Shapping. I have got a Snap-on Air mini sander. But a Drill with a Hook and Loop pad fitted will work fine. You should also have a "SUREFORM" or sanding block to make the shaping even and easier to do.
Start by sanding off all of the excess bondo on the edges and the hard lines. dont to too nuts or you will have to re apply. Always use alternating diagonal strokes, never go along the go along the panel as this will cause flat spots. Where needed go over edges with a curving motion, this will give you a nice curved edge, if not you will get sharp lines in the filler.
DONT STOP NOW, LOADS TO DO. Next up grab a can of contrasting paint. Spray on a Scatch coat. This will help during the next prosses and also gives you the satisfaction of seeing the bumper in a semi finished state.
Next up Wet Flatting. Grab a bucket of clean warm water and some Medium (600) Grit Wet & Dry Paper. Use a Foam Block for better control. You need to sand all of the area that you have scratch coated, you dont need to get all of the paint off the point is that the paint will show the differece between the HIGH & LOW spots. Use a light touch and plenty of water and sand the whole area. as this goes on you will see the low spots reveling themselves and the bondo will take on a smooth and silky aperence. Run you finger over the area regularly to check the finish, a bare finger is the best guage, and you will feel the lows and highs as well as any edges or ridges that you need to deal with.
All of the Low spots are where the paint is till showing. dont worry too much about the lines caused by sanding, you are more worried about the air pockets that have popped and the depressions. Now get your pens out HOT TIP comming.
Grab your Fibre Glass resin, put a dolop of Bondo an a mixing plate and make a hole in the middle, pour in a good bit of resin. Now mix it all up. This will give you a mix of bondo that is almost runny. It will still stick, but it is now really smooth, Also grab a can of spray paint and spray some on your mix. This will slightly change the colour of your mix and make it easier to sand later. Now mix in the Hardener you can add a bit more than normal but not too much. Now apply to the areas of low spots and try to keep it all neat and tidy.
Let this Set off and then its all about the Wet Flatting. Repeat if needed.
Now time for a Coffee in my Spice Girls Mug.
More soon Including Finishing and Paint.
Thanks for reading
Happy Modding
The Bishop
The Bishop- The Boss
- Posts : 71
Join date : 2012-01-24
Age : 48
Location : Barry-Bay-Dos -
Re: Bumper and Trim Smoothing.
![]() The Bishop Wed Mar 07, 2012 5:04 am
The Bishop Wed Mar 07, 2012 5:04 am
Bumper & Trim Smoothing: Part 3
Project Focci:
Ok Final part, Untill Dan decides he want omething diffrent. Next week!!!!!!!
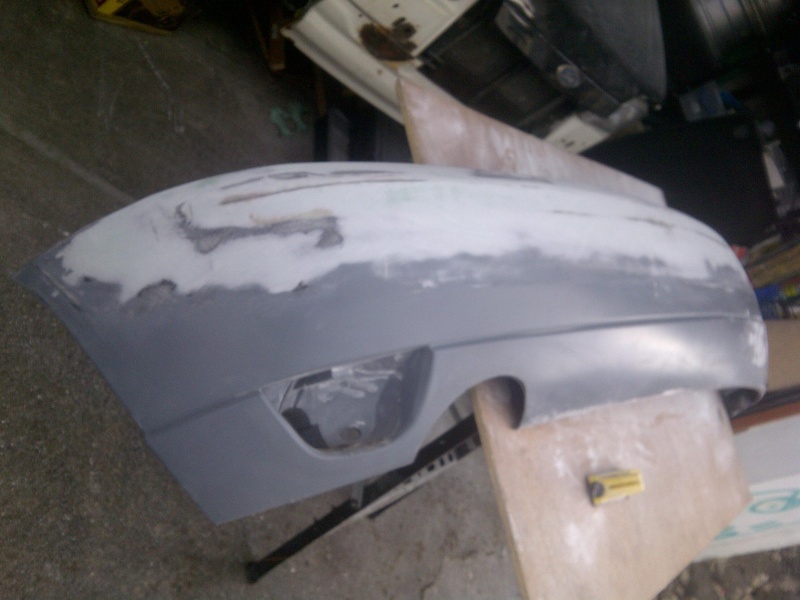
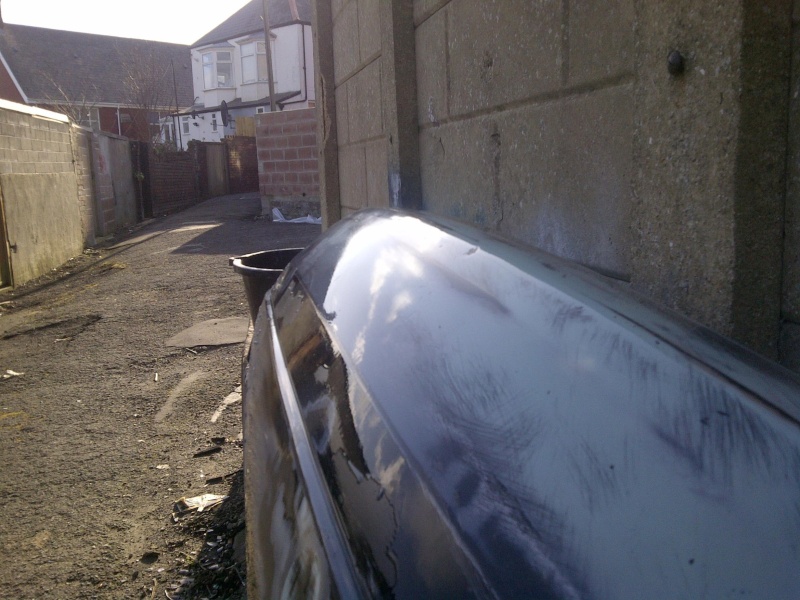
So we have put on a Flat skim to get rid of the imperfections in the bondo. We now need to Wet Flat using a 600 grit wet & dry. dont go nuts we just need to get it as smooth as a baby's arse. The Smoother the better. Since this is for paint it needs to be good ( if we were wrappin this wet flat would be good enough to start the wrap as it does hide alot).
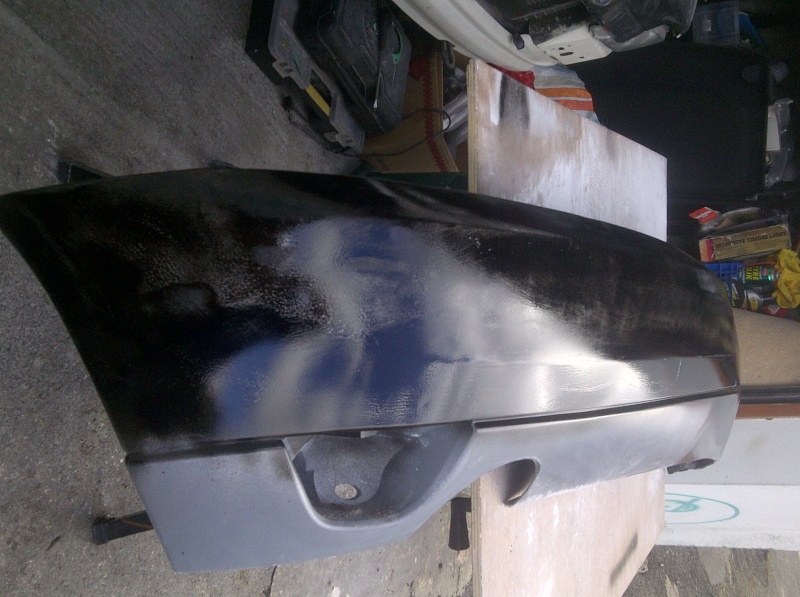
Wet Flat done, now to prime. Get yourself a decent HIGH BUILD PRIMER. This will fill in any of the tiny imperfections that are left, and give a good base for the paint to stick to. The High Build is yellow the Yellow coat, I have also put on a coat of Primer Grey as well, this is standard primer as oposed to HIGH BUILD, but it will give me a good finish and base for the paint.
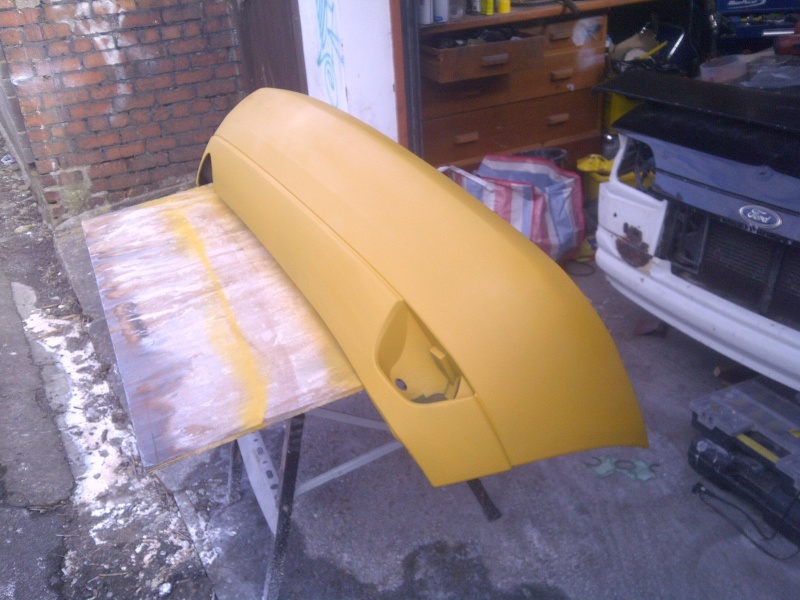
Give it a good Wet Flat, This time with a 1200 Grit Paper, dont go to hard as you are just goint to key up and get rid of any nasty bits before paint. You can see the yellow bits showing through, These are all high parts, the grey is covering the low parts.
Next Paint.
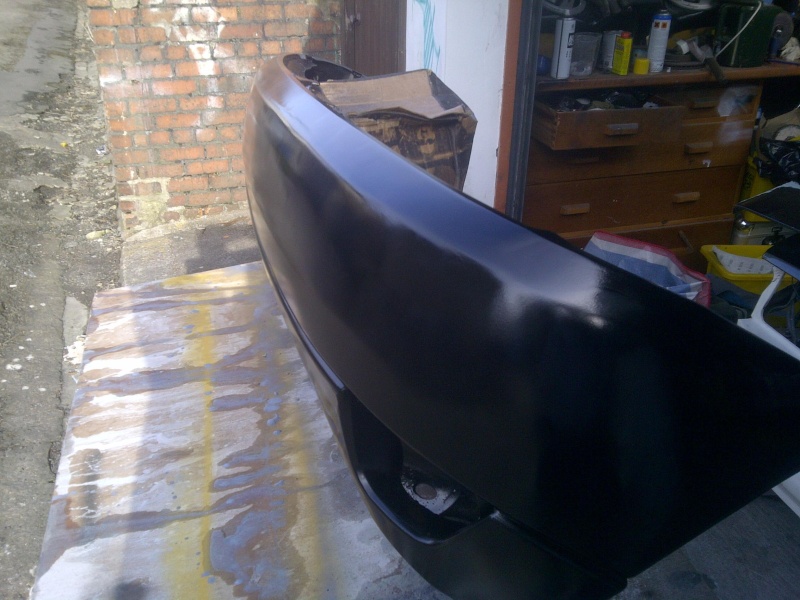
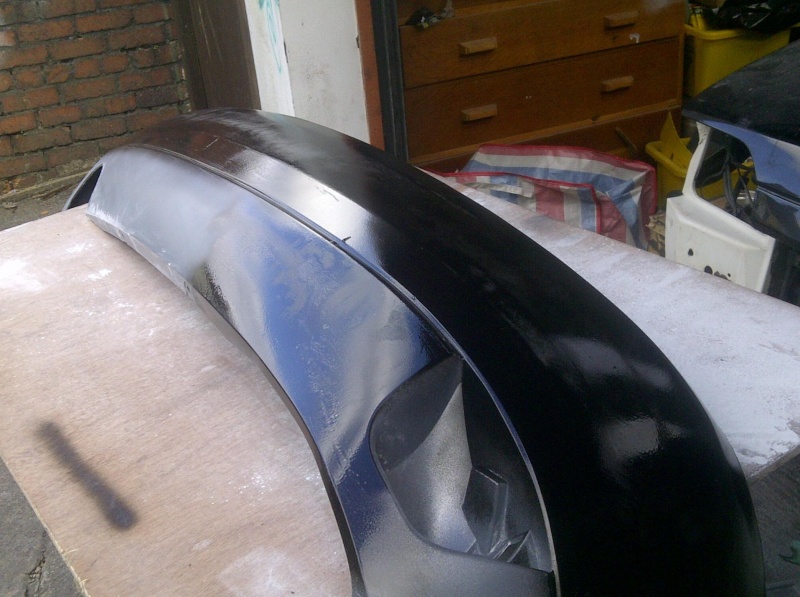
Thats it fresh on and still wet.
THats Pretty Much it people. I need to do another couple of coats for the right finish, so more wet Flatting (1500 Gritt) and it should be all done with now dredded Orange Peel.
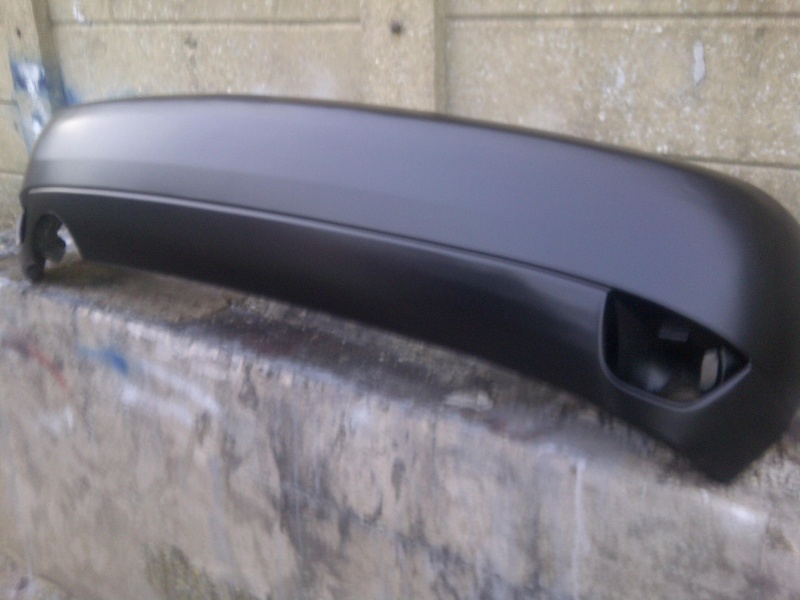
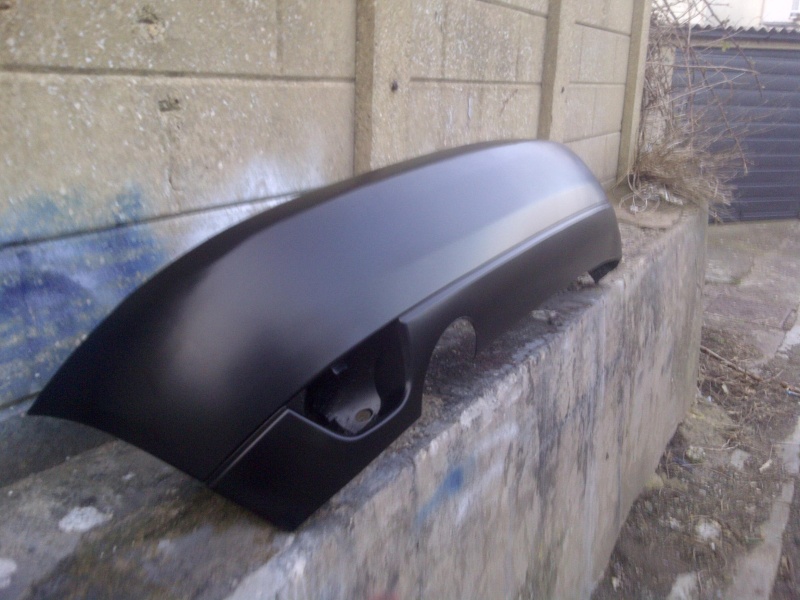
One Euro'd Bumper with Bump Strip and Tow Eye Removed in Satin Black. Only Front to do now WOOOOHOOOO.
Thanks for Reading / Hope it was helpful
Happy Modding
The Bishop
Project Focci:
Ok Final part, Untill Dan decides he want omething diffrent. Next week!!!!!!!
So we have put on a Flat skim to get rid of the imperfections in the bondo. We now need to Wet Flat using a 600 grit wet & dry. dont go nuts we just need to get it as smooth as a baby's arse. The Smoother the better. Since this is for paint it needs to be good ( if we were wrappin this wet flat would be good enough to start the wrap as it does hide alot).
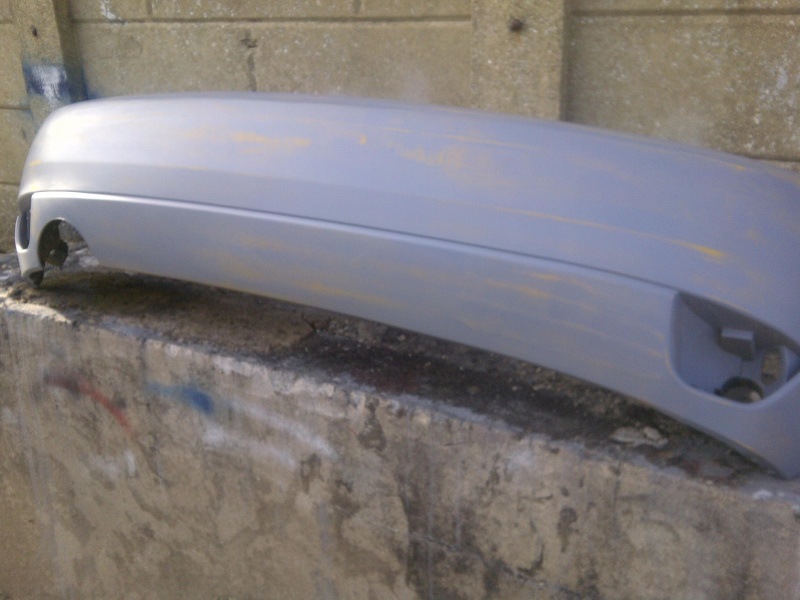
Wet Flat done, now to prime. Get yourself a decent HIGH BUILD PRIMER. This will fill in any of the tiny imperfections that are left, and give a good base for the paint to stick to. The High Build is yellow the Yellow coat, I have also put on a coat of Primer Grey as well, this is standard primer as oposed to HIGH BUILD, but it will give me a good finish and base for the paint.
Give it a good Wet Flat, This time with a 1200 Grit Paper, dont go to hard as you are just goint to key up and get rid of any nasty bits before paint. You can see the yellow bits showing through, These are all high parts, the grey is covering the low parts.
Next Paint.
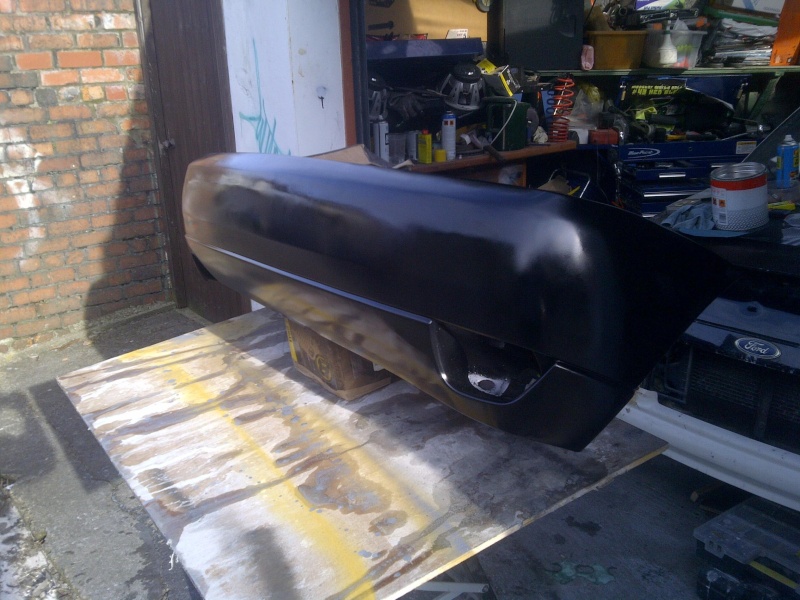
Thats it fresh on and still wet.
THats Pretty Much it people. I need to do another couple of coats for the right finish, so more wet Flatting (1500 Gritt) and it should be all done with now dredded Orange Peel.
One Euro'd Bumper with Bump Strip and Tow Eye Removed in Satin Black. Only Front to do now WOOOOHOOOO.
Thanks for Reading / Hope it was helpful
Happy Modding
The Bishop
The Bishop- The Boss
- Posts : 71
Join date : 2012-01-24
Age : 48
Location : Barry-Bay-Dos -
Admin- Admin
- Posts : 31
Join date : 2012-01-24
Age : 37
Location : Barry -
Page 1 of 1
Permissions in this forum:
You cannot reply to topics in this forum